What is "Cut & Sew"?
The term "cut & sew" refers to projects made from fabric where the pieces are printed directly on the material. You just cut them out and assemble using simple directions (usually also printed on the fabric). This is great for the beginning sewist or anyone who enjoys a quick, easy project with clear results.
Below are 2 types of cut & sew projects I've made – dresses and pajamas. Scroll to the bottom to see a video of me making a cut & sew project.
How to make a "Cut & Sew" Dress
Cut & Sew dresses are made from fabric where the dress pieces are printed directly on the material. You just cut them out and assemble using the directions below. This is great for the beginning sewist or anyone who enjoys a quick, easy project with clear results.
Click below to purchase this or any other of my Cut & Sew Dress designs from my fabric shop on Spoonflower. Each fabric fat quarter can make for size Charm (1/10-1/8), Bubba/Lolli (1/6) or Sweetheart (1/5).
Instructions
Here are the basic instructions to assemble my Cut & Sew Dress. You may choose to finish edges differently or embellish with laces and other fabrics as you wish! Each print includes templates to make ONE DRESS in any of these 3 sizes: Charm, Lolli/Bubba and Sweetheart. Feel free to ask me any questions if you need clarification on any of these instructions.
SEW THE BODICE:
Cut all the pieces apart, keeping the guidelines and labels together with the pieces.
---
Select a template size and place on top of the bodice print, both facing up.
---
Sew along dotted lines (A).
---
Cut out along the solid outline.
---
Notch curves by cutting little slits in the edges. Be careful not to cut the thread.
---
Turn right side out by pulling the sides through the shoulder openings. Press flat.
---
Sew sides (B) together and (C) together with the print facing the inside.
---
SEW THE SKIRT:
On the skirt print, mark a line and cut across and down according to template size.
---
Press bottom and sides in 1/4 inch.
---
Stitch along the folded edges.
---
Sew a wide, loose stitch along remaining top edge and gather to width of bodice waist.
---
Place skirt and bodice raw edges together with prints facing in.
---
Sew together and zigzag over raw edge.
---
Fold bodice up over seam and press flat.
---
Topstitch over waist seam.
---
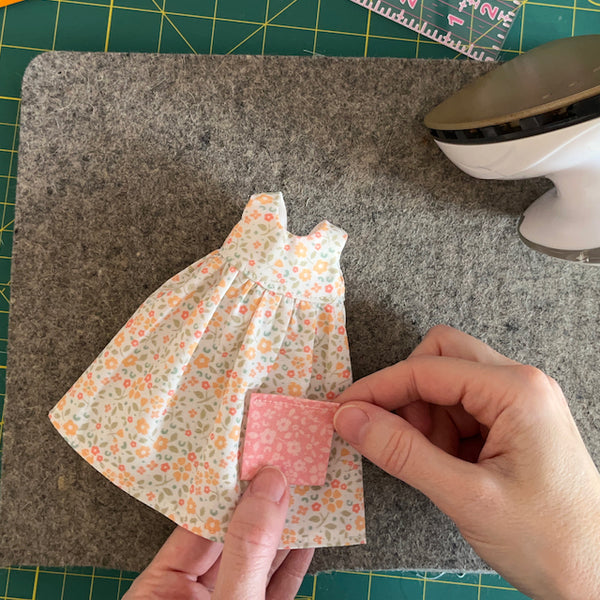
POCKET:
Trim to size desired and press all edges to the back.
---
Stitch pocket along top edge.
---
Position pocket where you like.
---
Sew to skirt around pocket sides and bottom.
---
Overlay one edge of skirt back over the other and sew halfway from bottom to waist.
---
Attach a snap to back to finish. (If you prefer not to use a snap you can instead attach lace or ribbon ties to the sides of the back.)
---
Done! :D
---
Here is the dress shown on my Bubba body (
measurements here) but this design will also fit MANY 1/6 scale, child dolls and YOSD BJDs.
All my "Cut & Sew" dress fabrics come with sizes to fit Sweetheart (1/5 scale) and Charm (1/8 scale) too!